Step 12
Duplicate the layer, change the blend to Multiply 50%.
Ctrl + E to merge the layers into one.
See how the buildings should be.
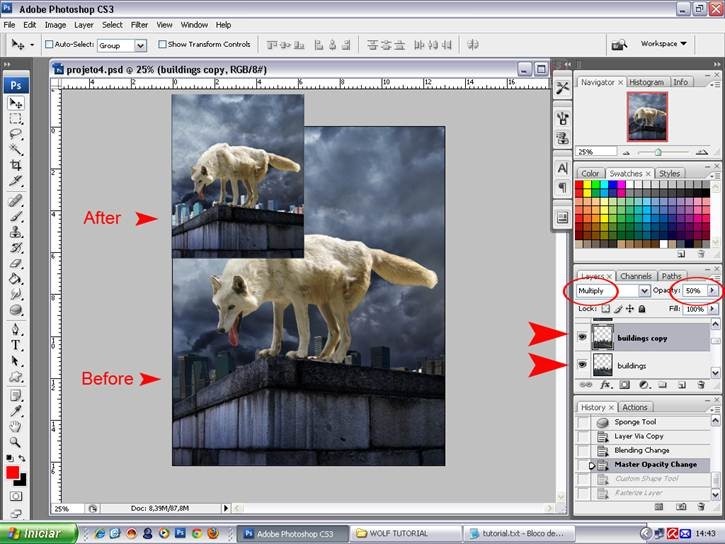
Step 12
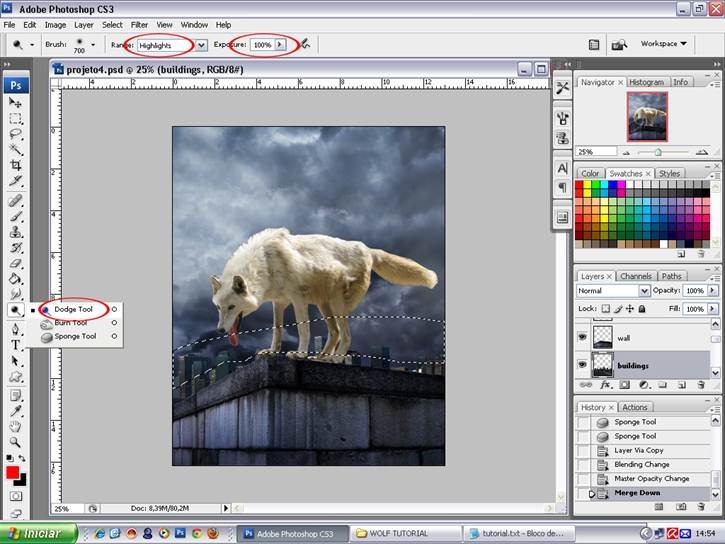
Go
in the sidebar and select the Dodge Tool in Highlights > Exposure
100% and give a light at the top of the buildings to brighten a little.
Step 13
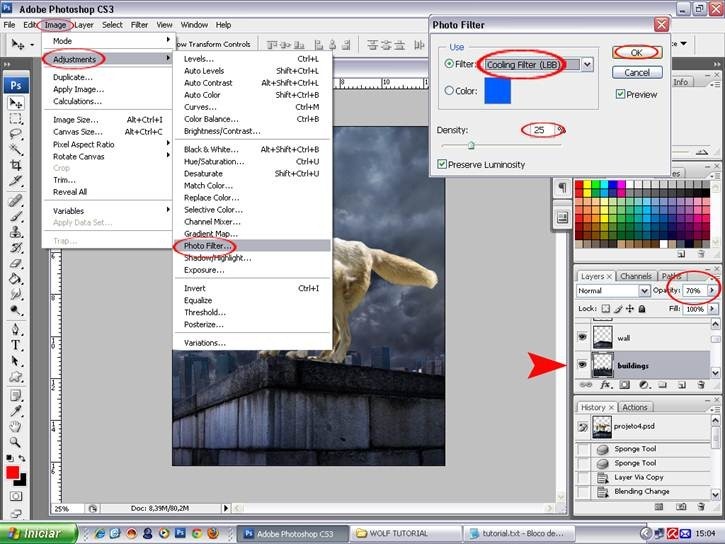
Go
to Image> Adjustments> Photo Filter and apply the Cooling Filter
(LBB) in 25%. You will see that the buildings were already in blue.
Reduce the layer opacity to 70%.
Step 14
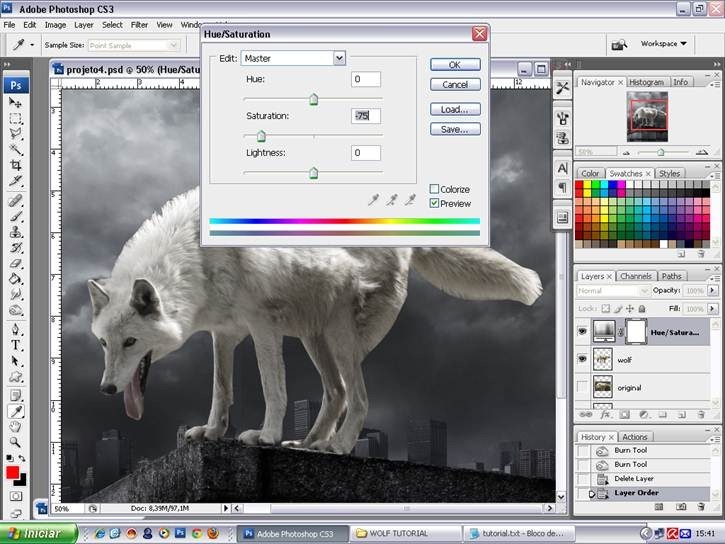
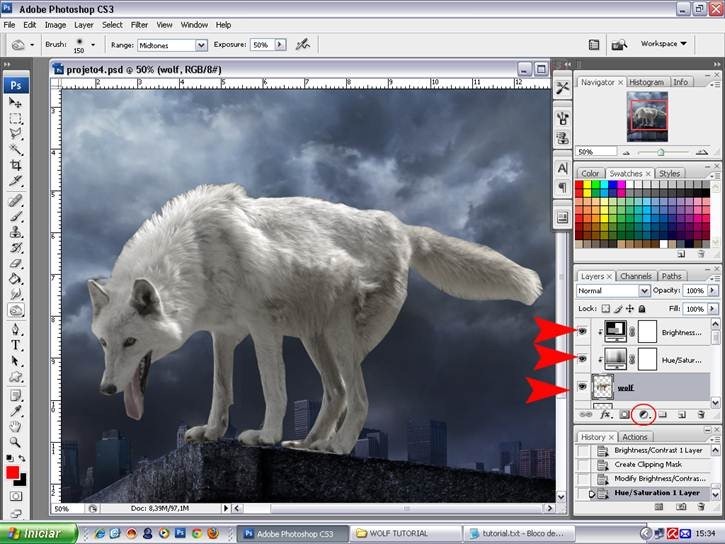
In the wolf will create a clipping mask layer for saturation and contrast.
For
those who do not know how to create, I will explain in detail: Go on
the symbol Adjustments Layers (represented by a circle half white half
black) Hue / Saturation
- Saturation -75
Step 15
After
applying this step, you will see that the effect is applied to every
image, but do not want that, we want the effect only in the wolf, that's
where the clipping mask enters. In layer Hue / Saturation, click the
right mouse button, go to "create clipping mask", and you will see that
the effect will be restricted only to the layer below it, in this case,
the wolf, which was the layer in which we wanted to apply the effect.
Then, whenever you want to apply an effect, whatever it is, only one
object, the clipping mask makes it easy for you. Let's do the same
procedure now with Brightness / Contrast. Go to the symbol of
Adjustments Layers again, open and choose Brightness / Contrast.
- Brightness -50
- Contrast -8.

Step 16
Right
click on the layer and create clipping mask. Can see that the layer is
connected to the layer below with a small arrow. This feature allows you
to change effects.
Step 17
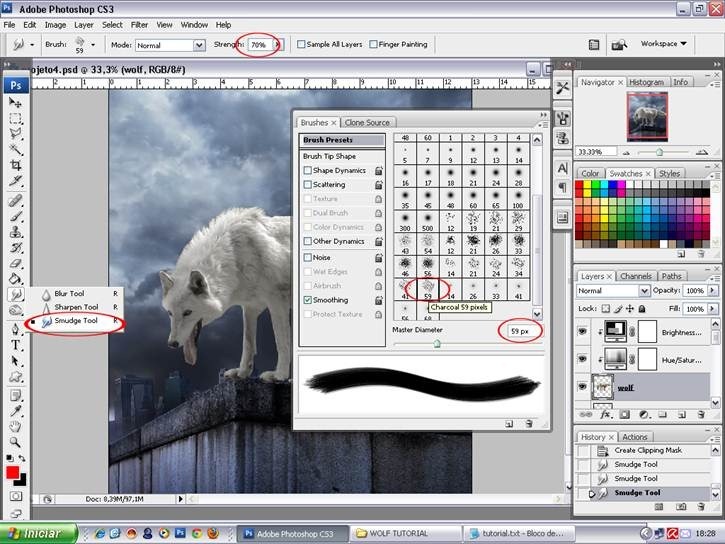
Now for most time consuming part, we work with some effects in the hair of the wolf.
On
the layer of the wolf, let's start making the hair. On the side
toolbar, we choose the Smudge Tool. On the keyboard "F5" to open a
window with brushes, we choose the Charcoal 59 pixels, it comes in
Photoshop itself, 70% strength.
Step 18
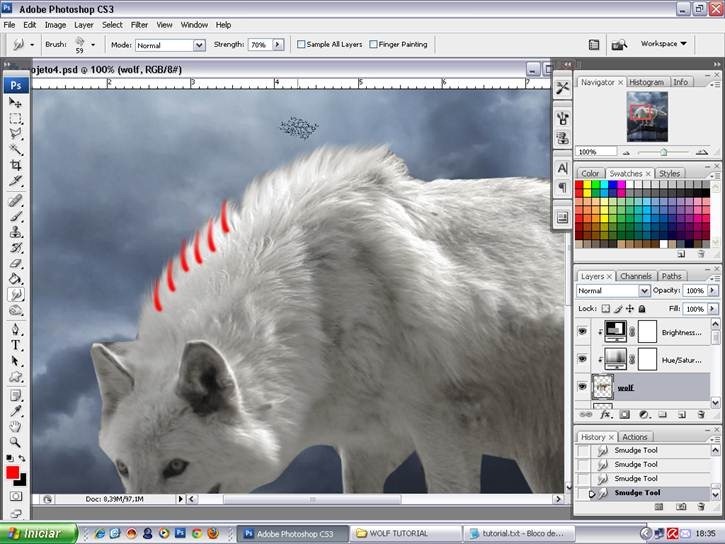
Let's brush the hair of the wolf from the inside out, only at the edges.
See
the picture where the strokes start. So, go all around the wolf,
looking always follow the direction of the hair, and when necessary to
reduce or increase the diameter of the brush, so you can control from
the keyboard, with keys ] to increase, and [ to decrease. Be careful not
to blur important parts around the face. Work with patience, until the
hair looks natural.
Step 19
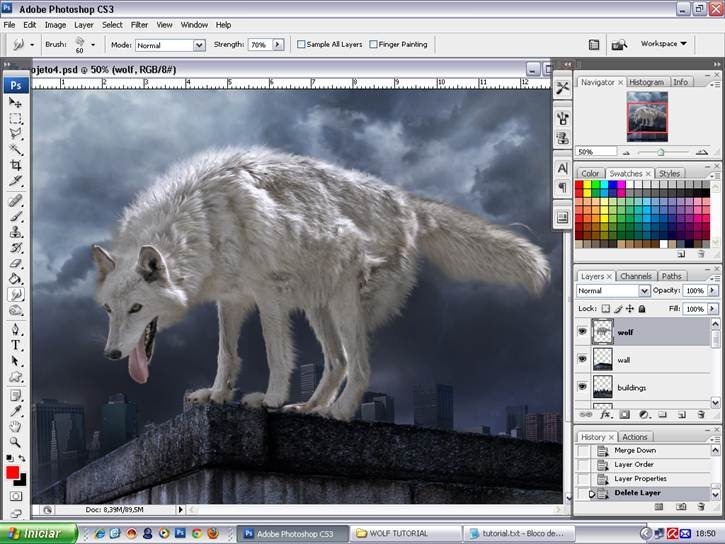
When finished, you can join the layers of effects, giving a Ctrl + E in each of them. Her wolf should look like this:
Step 20
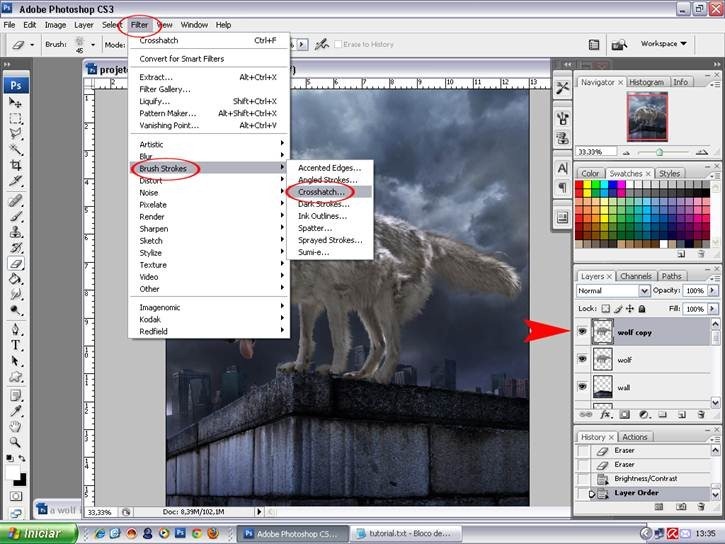
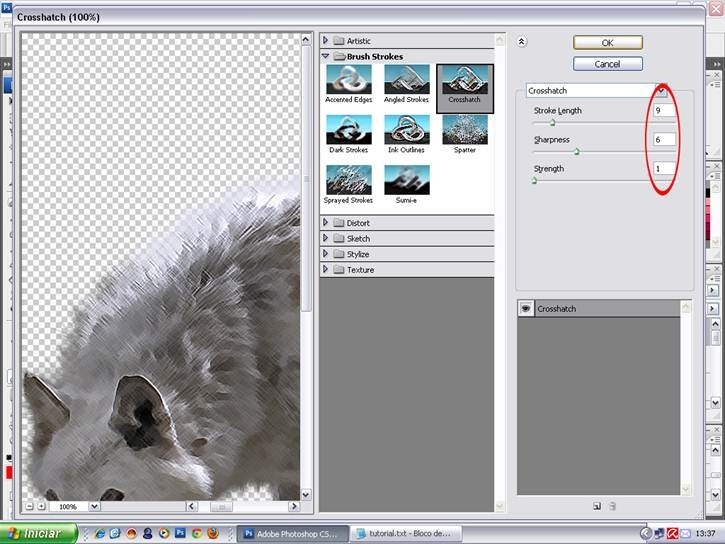
Duplicate the layer of the wolf, go to Filter> Brush Strokes> Crosshatch.
- Stroke Length> 9
- Sharpness> 6
- Strength> 1
Step 21
Allow the layer to 40% opacity, Ctrl + E to put together.
I applied this effect to give the appearance of dirty and wet.
Ctrl + J to duplicate layer.
Let's start taking care of the colors, shadows and lights of the wolf.
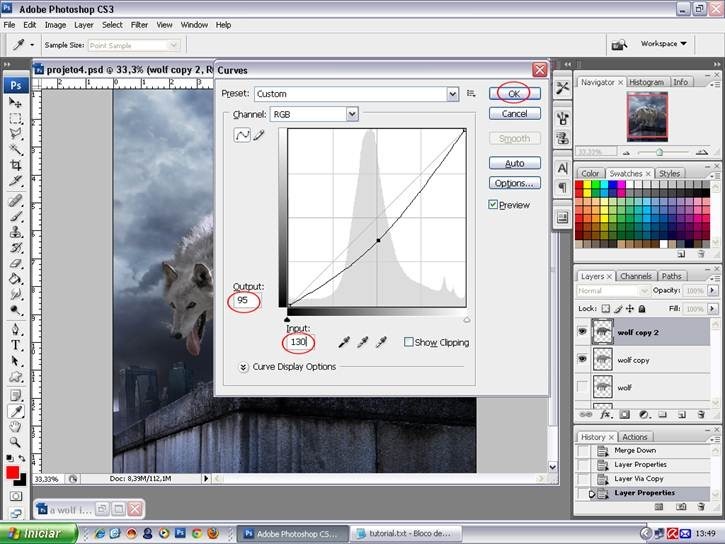
In the layer "wolf copy 2", Ctrl + M to open Curves box.
In RGB Channel,
- Outup: 95
- Input: 130
OK.
Step 22
On
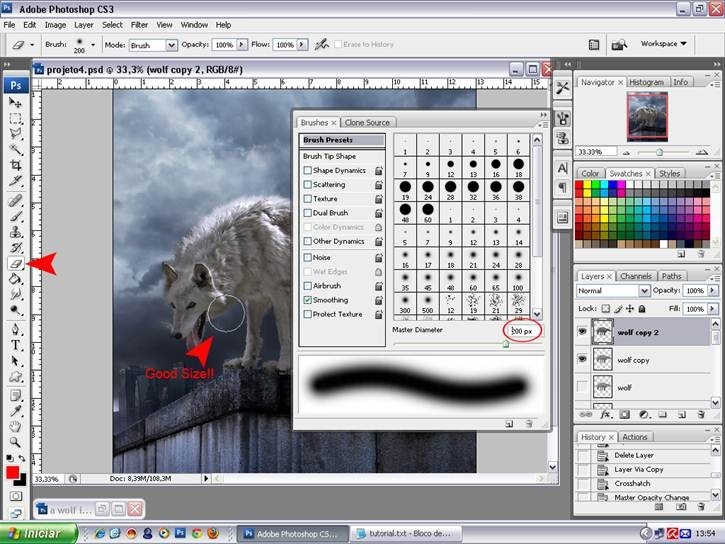
the keyboard type E to open the Eraser Tool, type F5 to open the window
of brushes and choose a smooth brush. I choose 200 px, because I found a
good size to erase the parts that do not want.
F5 to close the window.

ليست هناك تعليقات:
إرسال تعليق